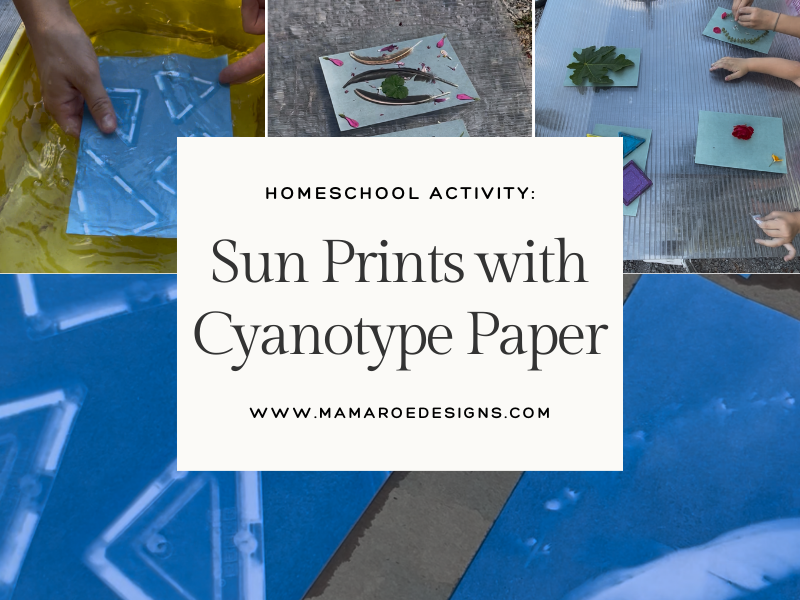
We stated back homeschooling this month and if I am being completely honest it has gone better than expected. We have had a few meltdowns and a few “this is boring!” moments, but overall nothing terrible. I contribute a lot of that to some fun projects I have sprinkled in to spice things up. One of the stars was working with Cyanotype paper! This was so cool and we used it as a science and art lesson! Science because it talks about chemicals, interactions with the sun, and looking at different types of nature. But also art because it is looking at different aspects of design and spacing and we are creating a picture. Making sun art with cyanotype paper would be the perfect homeschool activity for any age homeschooler. It is quick, easy, and not overly expensive.
Here is what you need
You will need some supplies. We had most of this stuff on hand, but we did have to go out and purchase two things. Here is a list of all the things we used:
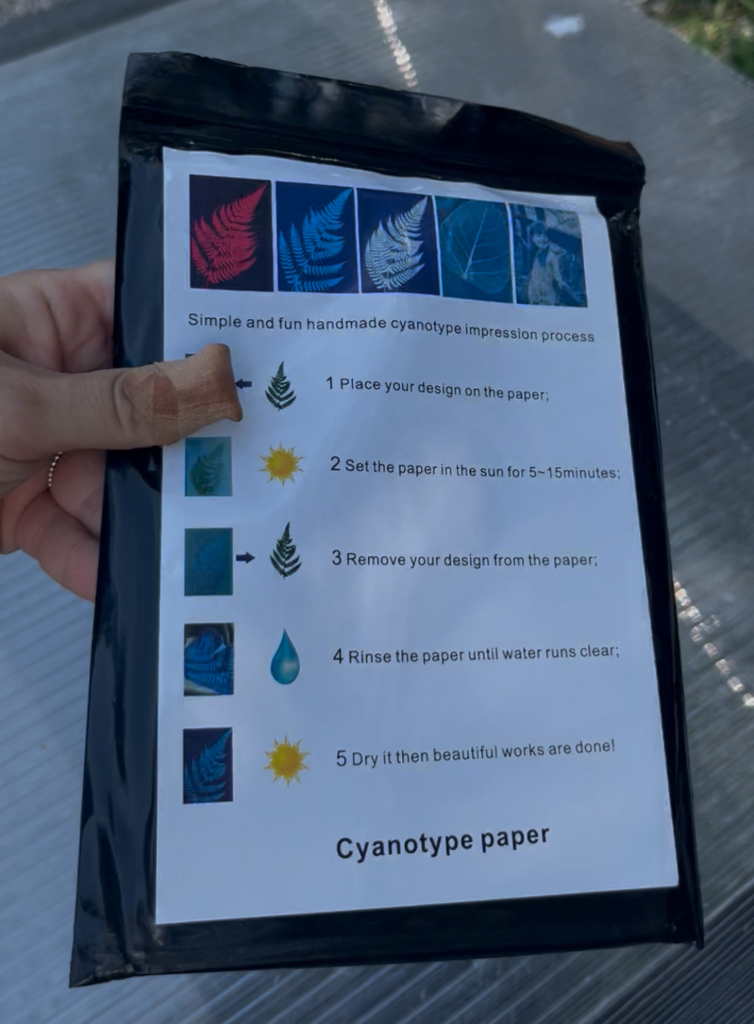
- Cyanotype Paper
- Piece of Glass or Acrylic (we bought an old picture from the thrift store and used the glass from it)
- Tub for water or a Water Hose
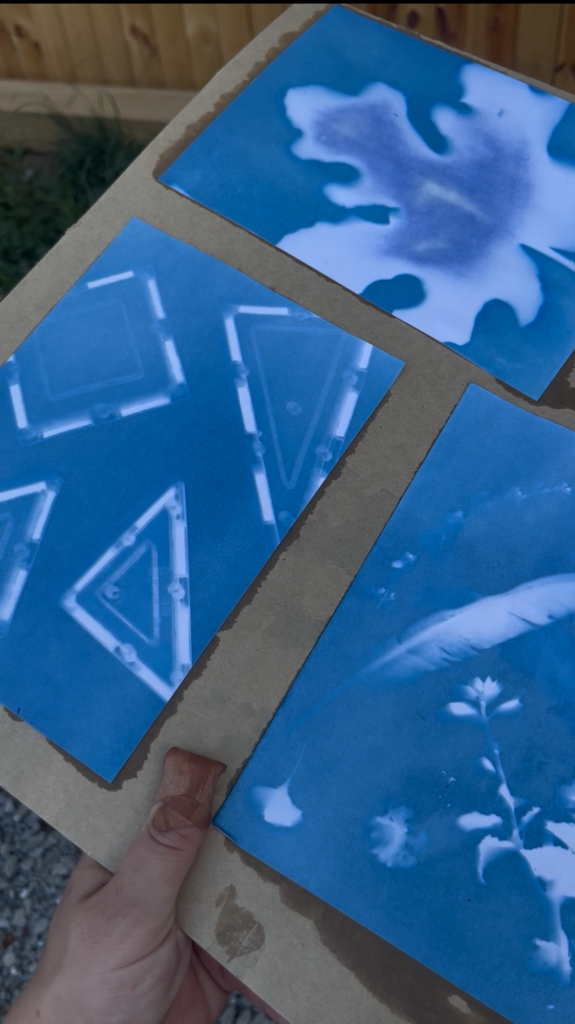
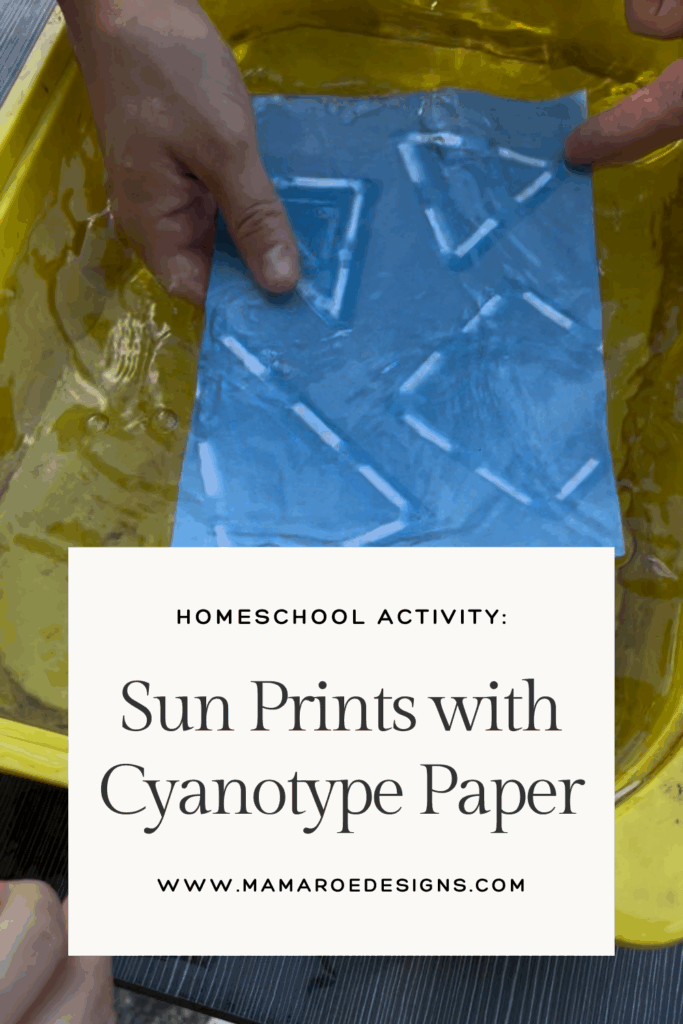
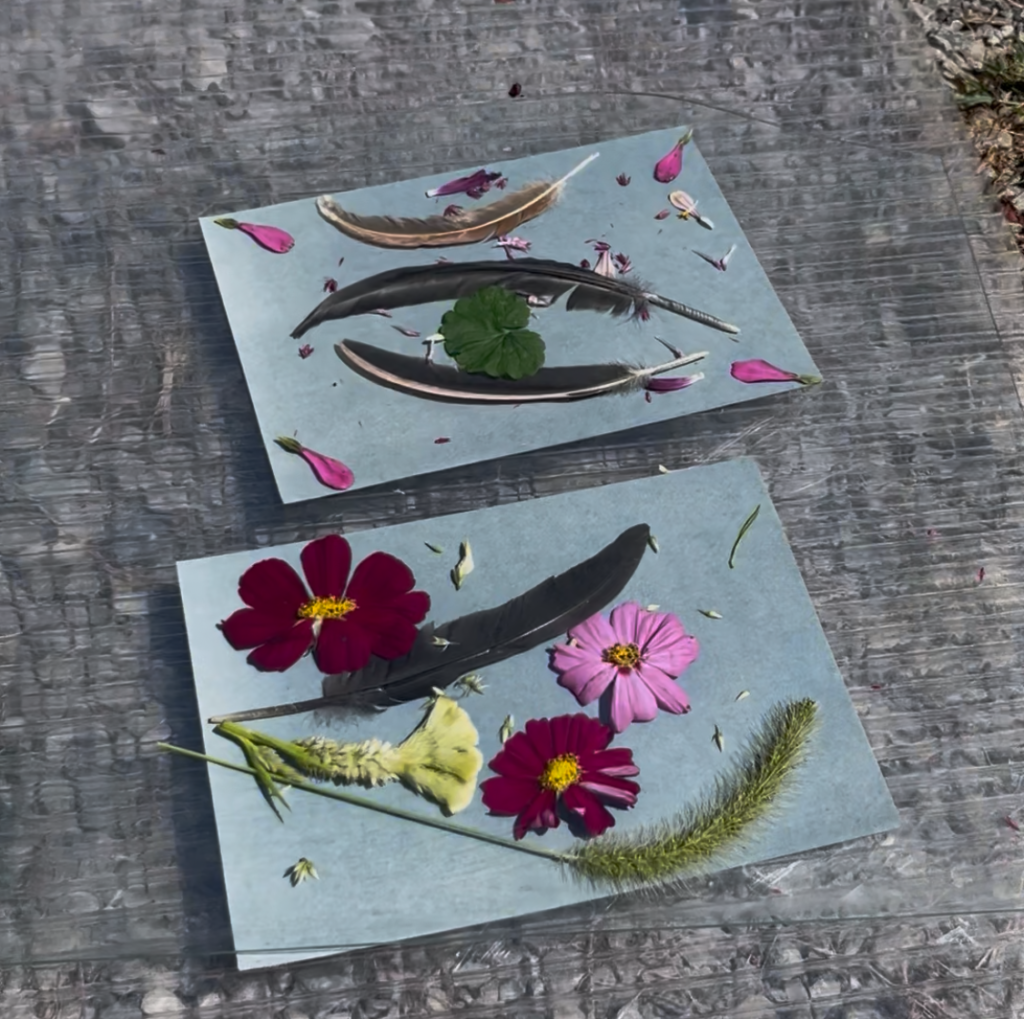
Then you will items to put on your paper. I love the nature aspect of this craft, but the coolest one we made was with magnetic tiles. So think outside the box on what you could put on your paper to make a neat design. After working with Cyanotype paper I have so many ideas for things to try!
How we did it
One of the most important parts of this project is to make sure that you don’t expose your paper to sunlight before you have placed your items. We worked on a table under a shade tree to avoid sun exposure. If you work in the sun, you will have a blurry image and it won’t turn out right. Also make sure you work with dry hands. We did multiple rounds and learned that wet hands will mess with the chemicals on the paper.

You will need to gather all of your fun items you plan to use on your sun art. We collected grass, herbs, flowers, toys, feathers, and rocks. All of the items need to be pretty flat, but you can get creative. I let my kids make whatever they wanted for this project, because we didn’t have anything learning specific in mind. We were just enjoying the process and over all concept. But if you wanted to make this more educations here are some ideas:
- Compare big and little sizes: organize big and little things on the paper to show case a growth in size.
- Tree Leaves: this would have been really cool. You could place multiple tree leaves on to see how they process. You might need larger paper though.
- Spelling their name: If you have letter tiles you could have them spell their name or create their name from nature. Even an initial would have been neat. We may revisit this project later to create some more fun things for their room!
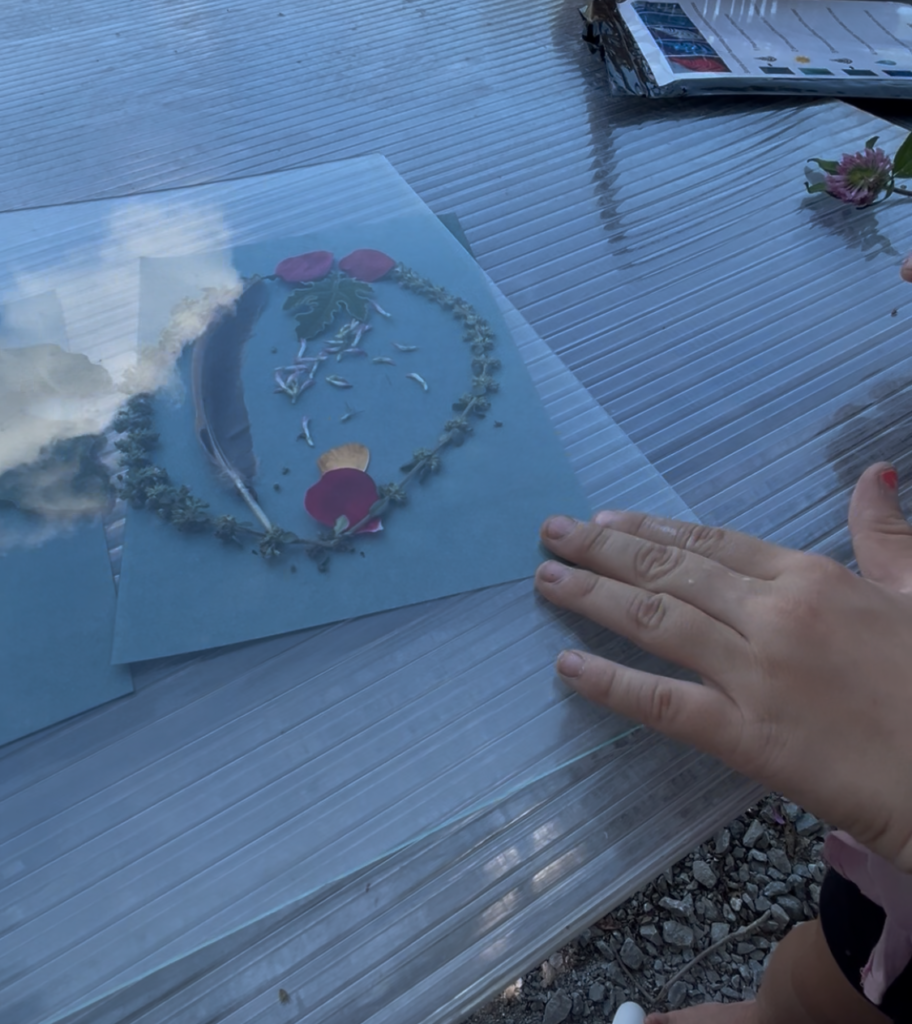
You will take the things they have collected and arrange them on the paper. Then you will need to place the glass over top of the design to keep it from blowing away or moving while it sits in the sun. We also worked on top of a piece of plastic that allowed me to move the art into the sun. You could use a piece of cardboard, wood, a rolling table, or whatever you have on hand. If you get a picture frame from the thrift store the backer to it would work too.
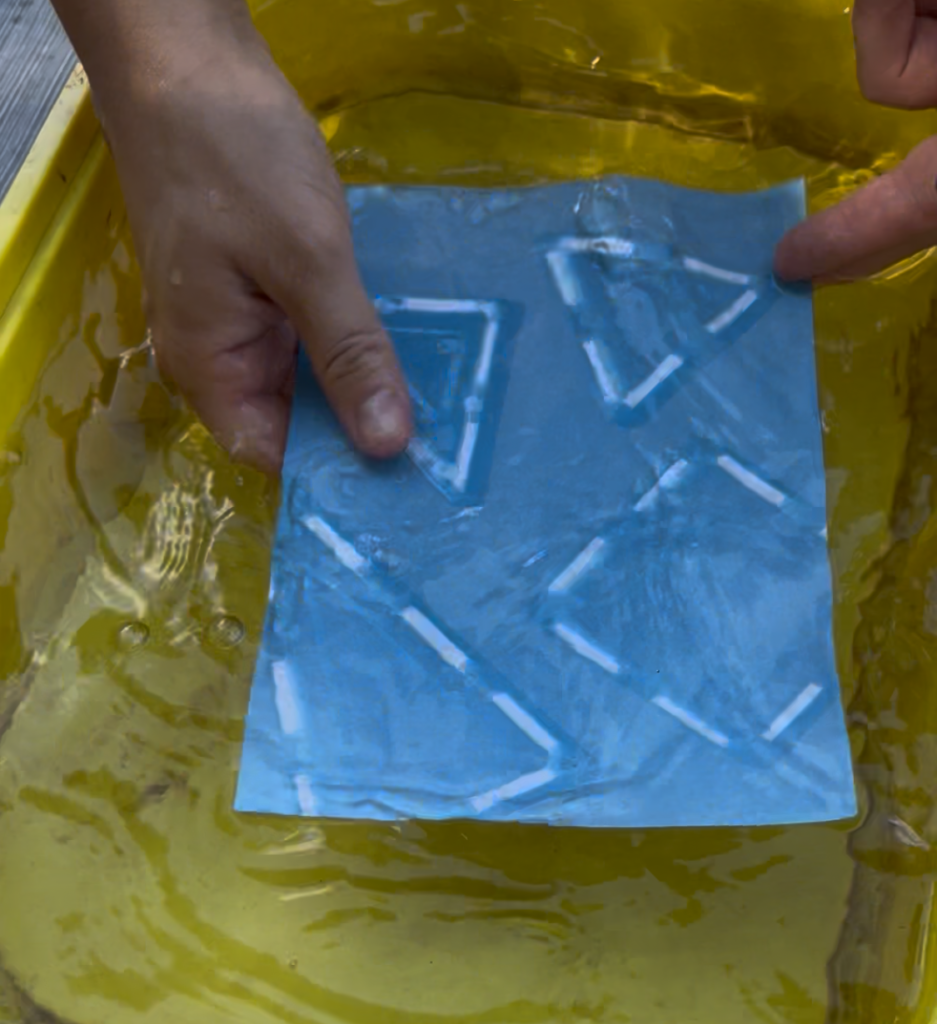
Then you will move it into the sun and let it sit for 5-15 mins. It won’t look like much is happening in that time frame but when you remove the subject matter from the paper you should see a change in color. Then you rinse until the water runs clean and let it dry. It should be a bright royal blue color, and will get a little darker as it dries.
We loved this project, and will probably keep this paper on hand for future art projects. It’s really easy, and by the end of it my oldest(6) could do it entirely on her own! Adding art to your homeschool day can help with so many things. For me it helps with grumpy attitudes, brings joy into the day, and helps my kids keep their creative spirit. I was amazed at what my oldest came up with. She had so many good ideas, and was so into her creations. I was shocked with the ideas she came up with, and you could see the gears turning in her head while she created. I love to see her little brain at work.
I hope you will give this a try and love it as much as we did!